Elevator Tower: Ivywood
completed October 2019
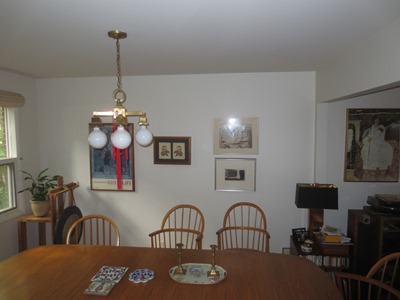
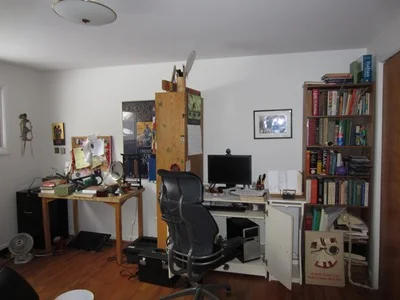
This is our 5th project with our awesome clients in the Ivywood neighborhood. Since the 1st project, they knew that they wanted to stay in their house and would need to remodel it over the years for aging in place. One of our previous projects was creating an age in place bathroom. In this project, we will be adding a residential elevator tower off of the west side of the house. The addition of the tower will actually enlarge the dining room, 2 study / home office areas, and the basement. Please visit this current work blog’ frequently to see the transformation.
The west side of the house will feature the elevator tower
May 1, 2019
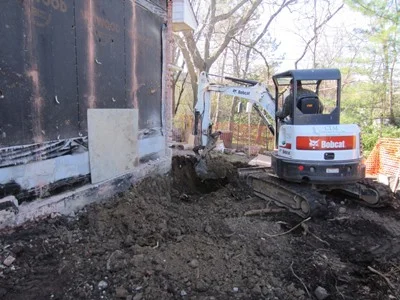
This is the location of our addition.
We begin by clearing the area of vegetation and debris.
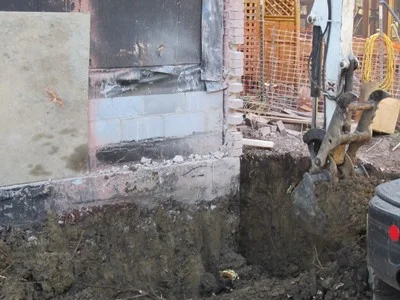
The brick veneer is cut at the precise location,
and peeled away from the surface.
May 8, 2019
We start digging.
The rain starts falling.
Voila! Our pool addition is finished!
jk… we’re actually pumping the water out.
May 17, 2019
After soils testing was completed, and a new strategy was developed, excavation has resumed.
A vapor barrier is laid on a stone base material. Reinforcing bars are placed and wired together.
The concrete truck sends the material to the new footing.
This large footing will provide the necessary support for the elevator structure, which requires stability and precision of construction.
May 29, 2019
Formwork for concrete footings is installed.
Material is poured. This will cure for a few days and the forms will be removed.
Concrete block has been delivered, and the tie-in with the existing house has begun.
A view standing in the elevator shaft looking at the new basement space.
June 6, 2019
The concrete slab floor is troweled smooth.
Matt and Larry finishing the block walls.
The foundation is coated with waterproofing materials.
June 13, 2019
The dirt is backfilled at the foundation walls.
Wall framing is underway.
A new sump pump is installed to remove water at the new addition.
June 20, 2019
2nd story framing o elevator
And roof extension
The elevator shaft
July 3, 2019
The electrical runs are installed.
Windows are installed at the back façade, but not on the side, to allow a easier loading of drywall sheets into the building.
Foam gives better insulation value at the HVAC runs of exterior walls.
Here, we framed with 2x8 studs for added depth.
July 17, 2019
The drywall was delivered, and the windows installed.
Drywall has been hung and is ready for tape and mud.
This is the top floor of the elevator.
We raised the ceiling and have a fan planned for above.
A look up into the elevator shaft.
HVAC ducts are connected to the furnace. This is the lower level of the elevator space. The concrete wall on the left used to be exterior and under ground.
July 24, 2019
The elevator shaft must have a drywall finish to slow flame spread in case of a fire. The open studs below will also be covered.
This is the upper level of the elevator.
Mud and tape of drywall are soon to follow.
This is the lower level of the elevator.
Insulation is required at exterior walls, including below grade.
August 6, 2019
We are working on exterior trim where the house used to end.
Inside, the first coat of paint is on the walls.
Interior doors are hung at the elevator.
August 13, 2019
The hoist motor sits at the top of the elevator shaft.
The rails run the height of the elevator hoistway. What you are seeing is a platform, built just for safety while installing the elevator mechanics.
This is the support frame for the elevator car.
This control panel is at the bottom level of the elevator. It has a back-up battery in case of a power failure.
August 20, 2019
Dave finishes the edge of the cut foundation wall with some plywood and trim…
…and builds some bookshelves for our clients to organize their space.
They requested we use a peg board at this wall to give flexibility to their storage solutions.
More bookshelves, because you can’t have too much.
August 27, 2019
Oak hardwood flooring arrives on site and is acclimated to the space.
Old floor boards are removed to allow new ones
to be toothed-in.
The paper underlayment helps prevent squeaks.
Everything is sanded together and ready for finish.
September 4, 2019
The controls and panel for the new elevator is in.
Interior flooring of the elevator is in;
oak to match the floor of the rest of the house.
September 13, 2019
The floors are all finished.
The lighting is done.
The office is ready for use.
September 27, 2019
meanwhile, outside...
The masons are on site and the brick laying begins.
Tying in to existing brick
And up the wall they go.
almost done…
October 8, 2019
Brick is done.
Alas, details that no one will ever see...
October 15, 2019
Trees arrive on site with a giant auger.
The chain link fence and gate has been installed to contain the guard dogs.
Our wonderful clients watch as the final work is completed on their project.


